

Relentless Craft. Unshakable Results.
About Us
Here at Atlas Solutions, we strive to be the solution for our customers problems. Quality is our goal and we go to great lengths to make sure the customer is happy and satisfied with the work; Treating the customer's home as if it was our own.

Some of our Services
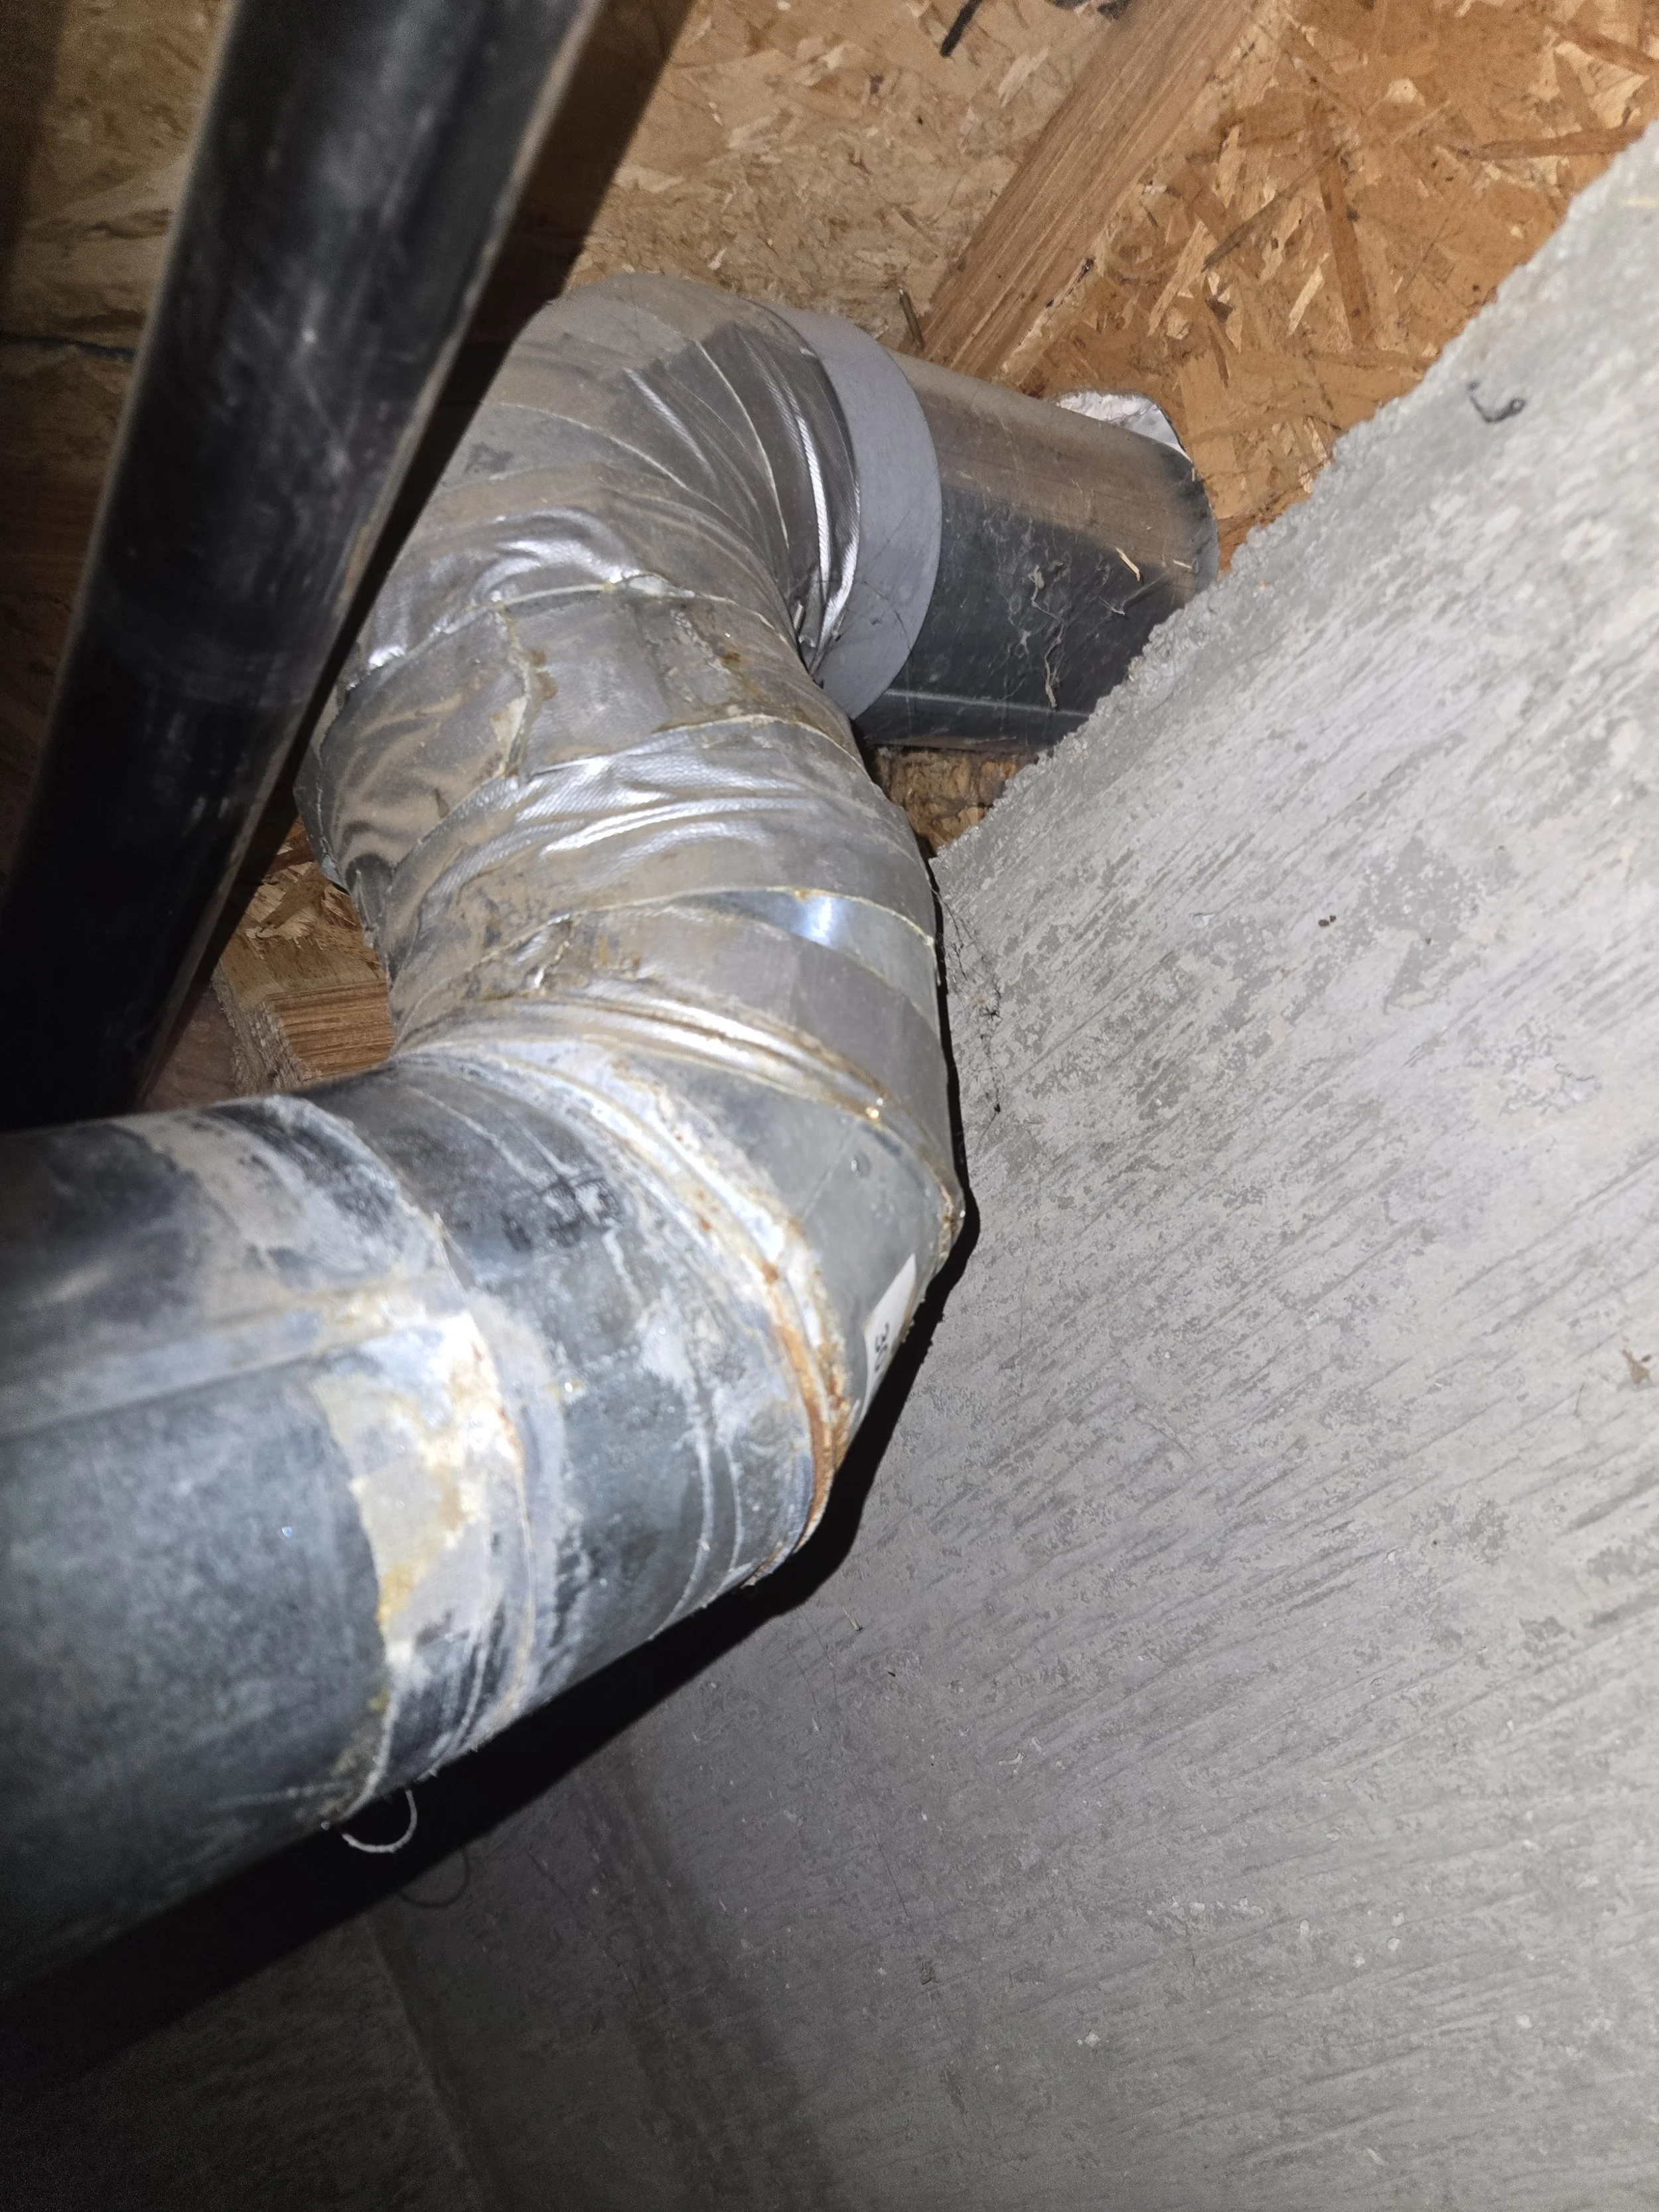
Dryer Vent Replacement and Repair
A clogged, damaged, or improperly installed dryer vent is more than an inconvenience — it’s a fire hazard, reduces dryer efficiency, shortens appliance life, and raises energy costs. Our Dryer Vent Replacement and Repair service delivers fast, reliable, code-compliant solutions to restore safe, efficient performance and protect your home.
What we do
Comprehensive inspection: We assess the entire vent system — inside the dryer, through the laundry area, attic or crawl space, and to the exterior termination — checking for blockages, kinks, loose or disconnected sections, deterioration, rodent or bird nesting, moisture damage, and improper materials or routing.
Thorough cleaning and debris removal: We remove lint buildup and obstructions using professional brushes and vacuums, clearing the full length of the duct to the outside vent hood.
Repair of damaged components: We replace crushed, torn, or disconnected ductwork; repair or reseal joints and seams; replace or reinstall vent hoods and flappers; and secure loose connections to prevent leaks and backdrafts.
Full replacement when needed: We install new, code-compliant ducting — rigid metal or semi-rigid aluminum recommended — sized and routed for optimal airflow. Flexible foil or vinyl ducts are removed and replaced with safer, long-lasting alternatives.
Vent termination upgrades: We install or replace exterior hoods, backdraft dampers, and bird/rodent screens, and ensure the termination point is correctly positioned and sealed to prevent pests and weather intrusion.
Safety and performance testing: Post-service testing includes airflow and lint-build up checks, dryer performance verification, and inspection for proper vent slope and clearance to reduce fire risk and moisture problems.
Code compliance and recommendations: We follow local building codes and manufacturer venting guidelines. When required, we provide documentation and recommendations for permitting or further repairs.
Why it matters
Fire prevention: Lint accumulation in vents is a leading cause of dryer fires. Proper repair and replacement dramatically lower this risk.
Improved dryer efficiency: Clear, properly sized ducts shorten drying time, reduce energy use, and extend dryer lifespan.
Better indoor air quality: Correctly venting removes lint-laden, humid air and prevents recirculation into living spaces, reducing mold and mildew risk.
Lower long-term costs: Replacing unsafe or inefficient venting prevents repeated repairs, reduces energy bills, and avoids costly damage from moisture or fire.
When to call
Drying cycles take much longer than normal
Burning smell when the dryer runs
Excessive lint near the dryer or at the exterior vent
Visible damage, crushes, or sagging duct sections
Dryer or vent hood feels hot to the touch during operation
Recent move-in, remodel, or roof/vent cap replacement
Materials and standards
Preferred duct: Rigid or semi-rigid metal (aluminum) ducts sized per dryer manufacturer and local code
Joints: Properly sealed and mechanically fastened (no foil tape only)
Exterior terminations: Vent hoods with backdraft dampers and insect/rodent screens
Avoid: Plastic, vinyl, or unsupported accordion-style flexible ducts
Process overview
On-site assessment and quote
System cleaning and inspection
Repair or replacement of ducting and components
Re-seal and secure connections; install termination hardware
Performance testing and customer walkthrough
Written report and maintenance tips
Maintenance tips
Clean dryer lint trap after every load
Inspect and clean vent every 6–12 months; more often for heavy use
Replace flexible plastic or vinyl ducts immediately
Keep exterior vent area clear of debris and snow
Schedule professional inspection when dryer efficiency drops or odors occur
We use industry-best materials and proven techniques. All replacement and repair work is backed by a satisfaction and safety guarantee, and we provide clear before-and-after documentation so you know the job was done right.
Schedule a professional inspection and protect your home with a safe, efficient dryer vent system.
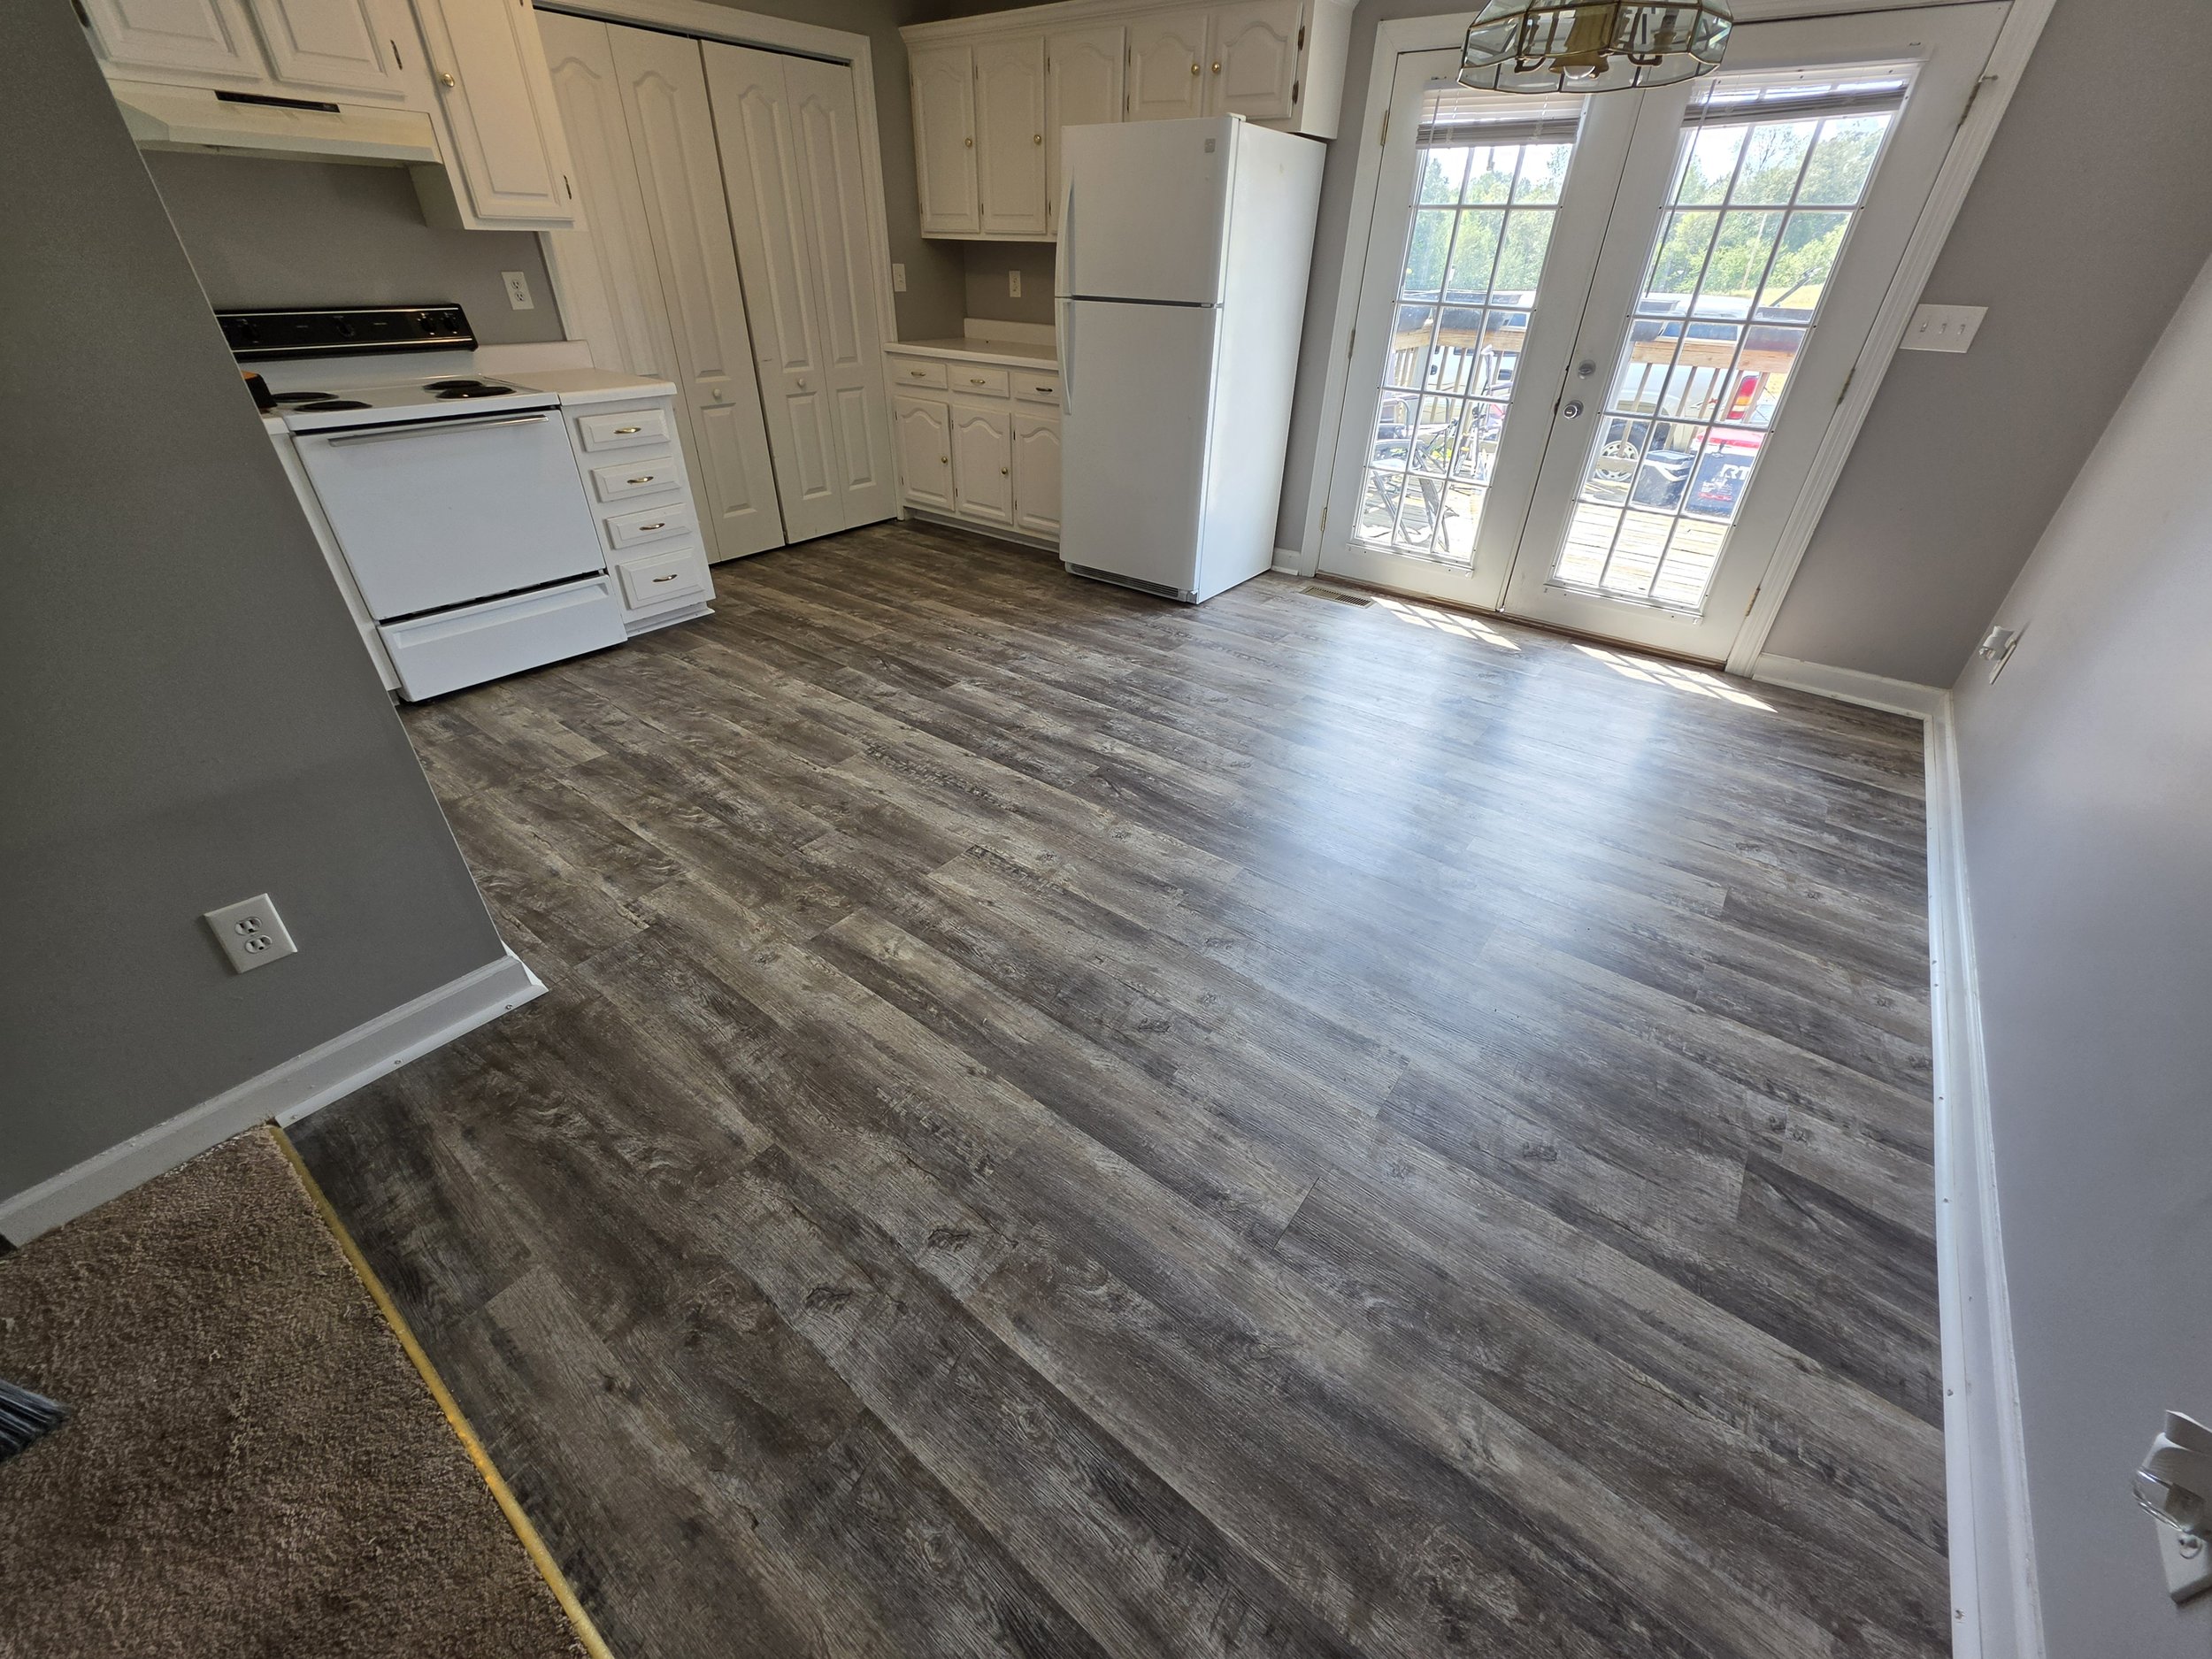
Professional Floor Installation
Transform your space with precision floor installation tailored to your needs. Our experienced crew handles every step — from subfloor inspection to final trim — delivering a durable, seamless finish that enhances appearance, comfort, and property value.
What we install
Luxury vinyl plank (LVP) and tile (LVT)
Laminate
Engineered composite and specialty flooring\
Carpet
Scope of work
Pre-installation assessment: Inspect subfloor, measure layout, identify moisture or structural issues, and recommend the best products and underlayment.
Preparation: Remove existing flooring and trim, repair or level subfloor, install vapor barrier or moisture mitigation when needed, and acclimate materials.
Layout and planning: Establish direction, pattern, transitions, and expansion gaps; mark threshold and doorway alignments for a balanced look.
Installation: Use manufacturer-recommended methods and industry best practices to secure materials. Ensure tight seams, consistent spacing, and correct adhesives or fasteners.
Finishing: Install baseboards, shoe molding, thresholds, reducers, and transitions. Clean the site and perform final inspections for quality.
Warranty and care: Provide manufacturer and workmanship warranty details, along with maintenance tips to extend the life of your floor.
Timeline and expectations
Typical residential installs range from one day (small rooms with floating floors) to several days (large areas or complex patterns).
Expect minor disruptions: furniture moving, dust containment, and temporary access restrictions.
Clear communication: Receive a project plan with start date, estimated duration, and a single point of contact.
Preparation checklist for homeowners
Remove small personal items and fragile decor.
Move or arrange for large furniture removal if requested.
Ensure pets and children are kept away from the work area.
Confirm access to water and power where needed.
Deliver a lasting upgrade with expert floor installation that combines durable materials, exacting workmanship, and an eye for detail. Contact us for an on-site estimate and a tailored installation plan.
Carpet Repair
Restore your carpet’s appearance and functionality with professional carpet repair services designed to eliminate damage quickly and seamlessly. Whether you have burns, tears, stains, pet damage, or seams that are coming apart, expert repair can save costly replacement and extend the life of your flooring.
Services Offered
Patch repair: Replace a damaged section with a matching piece taken from a closet or remnant to restore texture and pile direction.
Re-stretching: Remove wrinkles and ripples caused by loosened carpet and tack strip failure to prevent tripping hazards and premature wear.
Seam repair: Re-glue and re-tack separated seams to restore a continuous, professional look.
Burn and scorch repair: Remove singed fibers and replace small burned areas with matching material for a near-invisible fix.
Pet damage restoration: Replace chewed or stained sections, treat odors, and repair backing or padding when necessary.
Fraying and unraveling repair: Re-secure edges and rebind to stop further unraveling and preserve carpet integrity.
Padding replacement: Replace damaged padding beneath repaired areas to restore comfort and support.
Why Choose Professional Repair
Cost-effective: Repairs are usually far less expensive than full replacement.
Faster turnaround: Most repairs can be completed in a few hours, minimizing disruption to your home or business.
Preserve value: Maintaining existing carpet preserves subfloor protection, insulation, and appearance.
Tailored solutions: Professionals match pile direction, color, and dye lot to achieve seamless blends.
Safety: Proper re-stretching and seam repair eliminate trip hazards and extend carpet life.
What to Expect During Service
Inspection: A technician evaluates the damage, underside/backing, and nearby carpet stock to determine the best repair method.
Material sourcing: If needed, a remnant or piece from a closet is used for an exact match; otherwise, the tech will advise on options.
Preparation: Area is cleaned and surrounding fibers are trimmed. Damaged padding is inspected and removed if necessary.
Repair: Patch, seam, or re-stretch procedures are performed using industry-grade tools and adhesives.
Finishing: Fibers are blended, pile direction corrected, and the area cleaned. Any odors from pet damage are treated.
Final walk-through: The technician reviews the repair and provides care tips to maintain the restored area.
When Repair Isn’t Recommended
Large-scale damage across multiple rooms
Severe dye-lot mismatch with no suitable remnant
Carpet older than its expected life with widespread wear
Extensive mold, water damage, or structural subfloor issues
Care Tips After Repair
Avoid heavy traffic on repaired areas for 24–48 hours.
Vacuum with a suction-only or low-beater setting to protect the blend.
Use area rugs or runners in high-traffic zones to prevent repeat damage.
Address spills immediately and schedule professional cleaning every 12–18 months.
Get the Most from your carpet. Smart repairs keep your carpet looking better, longer. Whether you need a minor patch or a complex restoration after pet or smoke damage, professional carpet repair restores comfort, safety, and aesthetic appeal—without the full-cost commitment of replacement.